
How to Reduce Docker Image Size? From 1.3 GB to 8 MB in a Few Steps
Concrete techniques that helped me shrink a Docker image from over a gigabyte to just a few megabytes. Multistage builds, distroless, scratch, layer caching — no theory, just numbers.
When I built my first Docker image, I did it the way most people do at the start: FROM golang:1.23, copy files, build the binary, done. The image weighed 1.34 GB. The application? 7 MB.
Yes, you read that right — 7 MB of code wrapped in 1.34 GB of tooling I don’t need in production. It’s like driving an F1 driver to a race in a truck full of sandbox equipment.
In this post I’ll show you the concrete techniques that helped me bring that same image down to 7.79 MB. No theory — just configs and numbers.
Why should we even care about size?
Before we get to the techniques, let me quickly explain why this matters:
- Faster deploys — a smaller image means a shorter
docker pullin CI/CD. When you deploy many times a day, the difference between 1 GB and 10 MB is real. - Smaller attack surface — every package in the image is a potential security vulnerability. Golang 1.23 had 45 CVEs (2 critical). Switch to a minimalist image and only your application’s own CVEs remain.
- Cost — registries store images. With a large organization and hundreds of services, hundreds of megabytes per version add up fast.
- Cold start — especially important when scaling horizontally in Kubernetes. A new pod must pull the image before starting.
1. Multistage builds — the biggest breakthrough
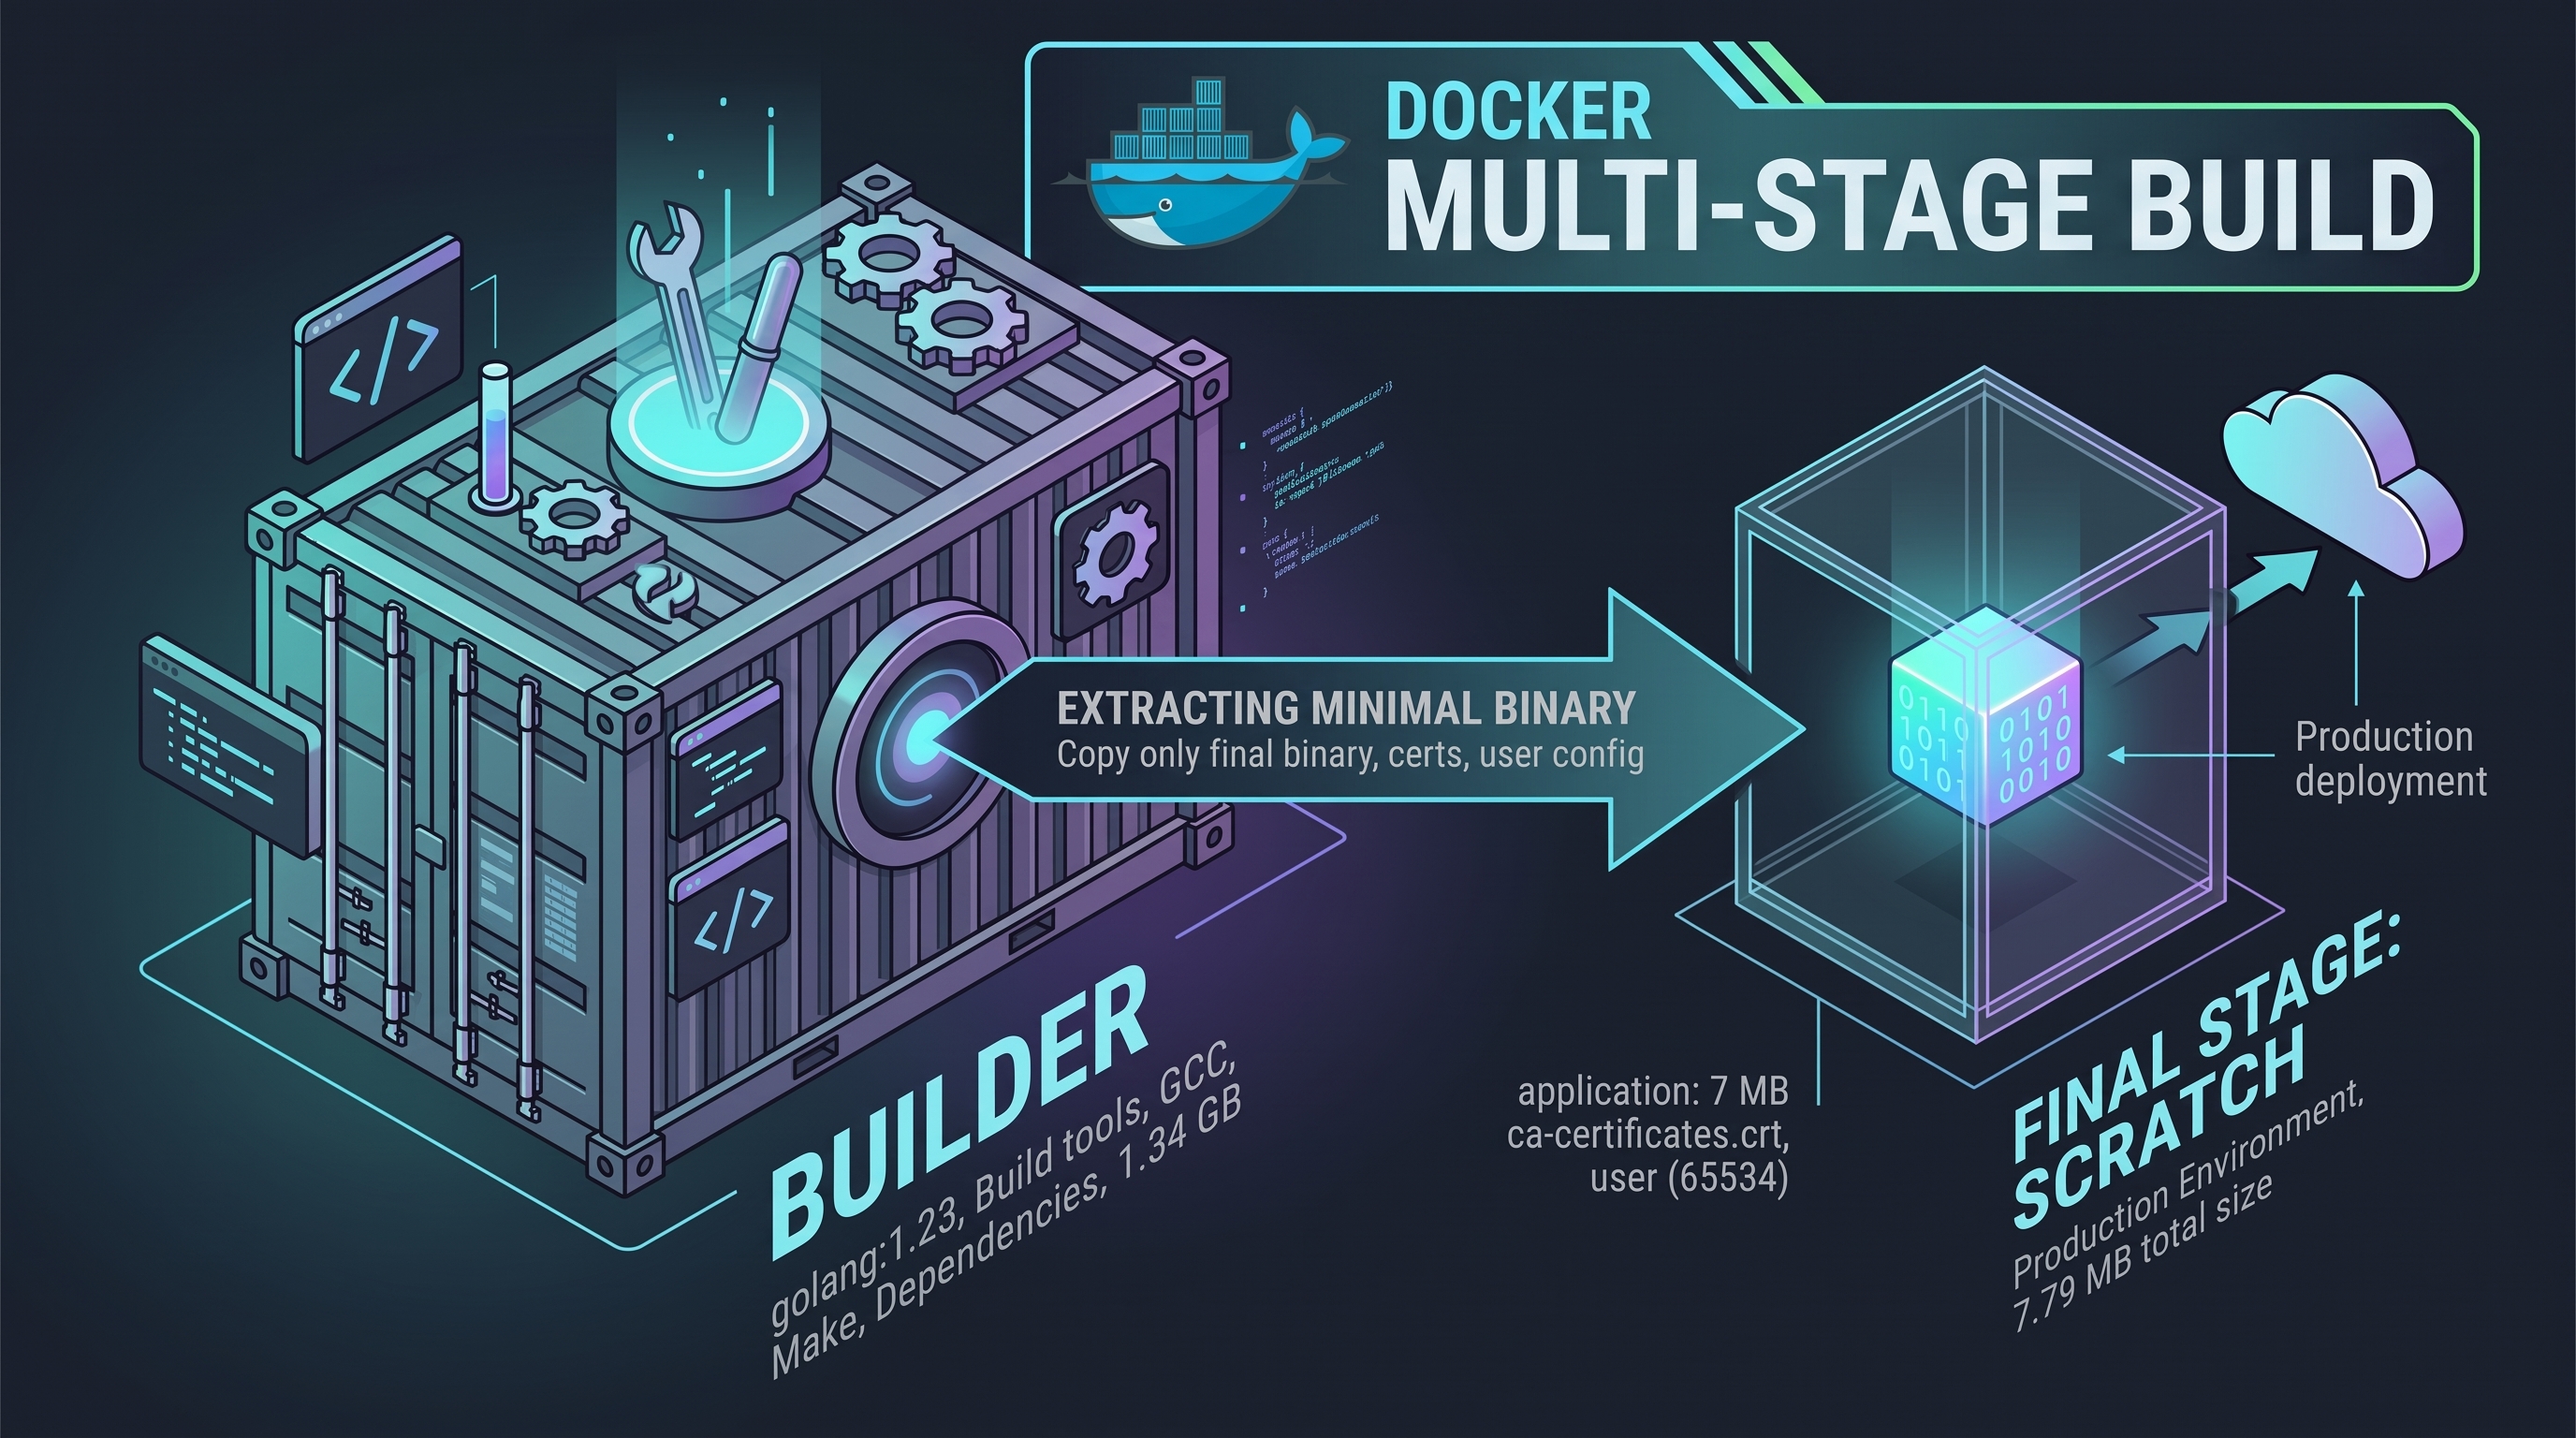
This is one change that delivers the biggest impact. Instead of building and running the application in a single container, we separate the build stage from the runtime stage.
What does a naive Go Dockerfile look like?
FROM golang:1.23
WORKDIR /app
COPY go.mod go.sum ./
RUN go mod download
COPY . .
RUN go build -o main .
EXPOSE 8080
CMD ["./main"]
Result: 1.34 GB. Inside you have the entire Go toolchain, compiler, debugger — things you don’t need to run the app in production.
Multistage build — stage 1: build
FROM golang:1.23 AS builder
WORKDIR /app
COPY go.mod go.sum ./
RUN go mod download
COPY . .
RUN CGO_ENABLED=0 GOOS=linux go build -ldflags="-s -w" -o main .
Two details that make a difference:
CGO_ENABLED=0— compiles a statically linked binary. It doesn’t require any system libraries at runtime.-ldflags="-s -w"— strips the debugger information and symbol table from the binary. The binary itself is a few percent lighter.
Multistage build — stage 2: run
FROM scratch
COPY --from=builder /etc/ssl/certs/ca-certificates.crt /etc/ssl/certs/
COPY --from=builder /app/main .
USER 65534
EXPOSE 8080
CMD ["./main"]
FROM scratch is literally an empty image. Zero OS, zero shell, zero tools. We copy only what we need: the binary and CA certificates (for HTTPS connections).
Result: 7.79 MB. A reduction of 99.4%.
2. Distroless — a compromise between scratch and full OS
scratch is great, but has one problem: no shell means you can’t do docker exec -it <container> /bin/sh for debugging. There’s also no built-in healthcheck support via wget/curl.
Google’s distroless is the middle ground: a minimal runtime environment without a package manager or shell, but with basic system files.
FROM golang:1.23 AS builder
WORKDIR /app
COPY go.mod go.sum ./
RUN go mod download
COPY . .
RUN CGO_ENABLED=0 GOOS=linux go build -ldflags="-s -w" -o main .

# Intermediate stage — grab a static wget for the healthcheck
FROM alpine:3.19 AS wget-src
RUN apk add --no-cache busybox-static

FROM gcr.io/distroless/static:nonroot
COPY --from=wget-src /bin/busybox.static /usr/bin/wget
COPY --from=builder /app/main .
HEALTHCHECK --interval=30s --timeout=5s --start-period=10s \
  CMD ["/usr/bin/wget", "--spider", "-q", "http://localhost:8080/health"]
USER nonroot
EXPOSE 8080
CMD ["./main"]
Result: 15.9 MB — a bit more than scratch, but we have a healthcheck and a better security baseline.
Note for Mac ARM users: The path to busybox.static differs by architecture. On arm64 it’s
/bin/busybox.static, on x86_64 it’s/usr/sbin/busybox.static. If you build on a Mac and deploy to an x86 server, this might surprise you.
3. Java — from 1.43 GB to 324 MB
In Java you can’t use scratch. JVM is JVM. But we can squeeze a lot out by choosing the right base image.
Step 1: JDK only for building
FROM eclipse-temurin:21-jdk AS builder
WORKDIR /app
# pom.xml first — cache Maven dependencies
COPY pom.xml .
RUN mvn dependency:go-offline -q
# Then the sources
COPY src ./src
RUN mvn package -DskipTests -q

FROM eclipse-temurin:21-jre-alpine
WORKDIR /app
RUN addgroup -S app && adduser -S app -G app
COPY --from=builder /app/target/*.jar app.jar
USER app
EXPOSE 8080
ENTRYPOINT ["java", "-jar", "app.jar"]
eclipse-temurin:21-jre-alpine instead of eclipse-temurin:21-jdk — JRE without the compiler and dev tools, on Alpine Linux instead of Debian.
Result: 324 MB instead of 1.43 GB. A reduction of 77%.
Step 2: Spring Boot Layer Tools — cache optimization
Since Spring Boot 2.3, you can “decompose” a fat jar into 4 layers ordered by change frequency:
dependencies— external libraries (rarely change)spring-boot-loader— Spring’s loader (almost never)snapshot-dependencies— snapshots (occasionally)application— our code (changes with every commit)
FROM eclipse-temurin:21-jdk AS builder
WORKDIR /app
COPY pom.xml .
RUN mvn dependency:go-offline -q
COPY src ./src
RUN mvn package -DskipTests -q

FROM eclipse-temurin:21-jdk AS extractor
WORKDIR /app
COPY --from=builder /app/target/*.jar app.jar
RUN java -Djarmode=layertools -jar app.jar extract

FROM eclipse-temurin:21-jre-alpine
WORKDIR /app
RUN addgroup -S app && adduser -S app -G app
# Layers from least to most frequently changed
COPY --from=extractor /app/dependencies/ ./
COPY --from=extractor /app/spring-boot-loader/ ./
COPY --from=extractor /app/snapshot-dependencies/ ./
COPY --from=extractor /app/application/ ./
USER app
EXPOSE 8080
ENTRYPOINT ["java", "org.springframework.boot.loader.launch.JarLauncher"]
The size is the same (325 MB), but a rebuild after a code change takes 2.9s instead of 3.1s — because Docker caches 3 of the 4 layers and only rebuilds the one with our code.
4. Instruction order — cache is your friend
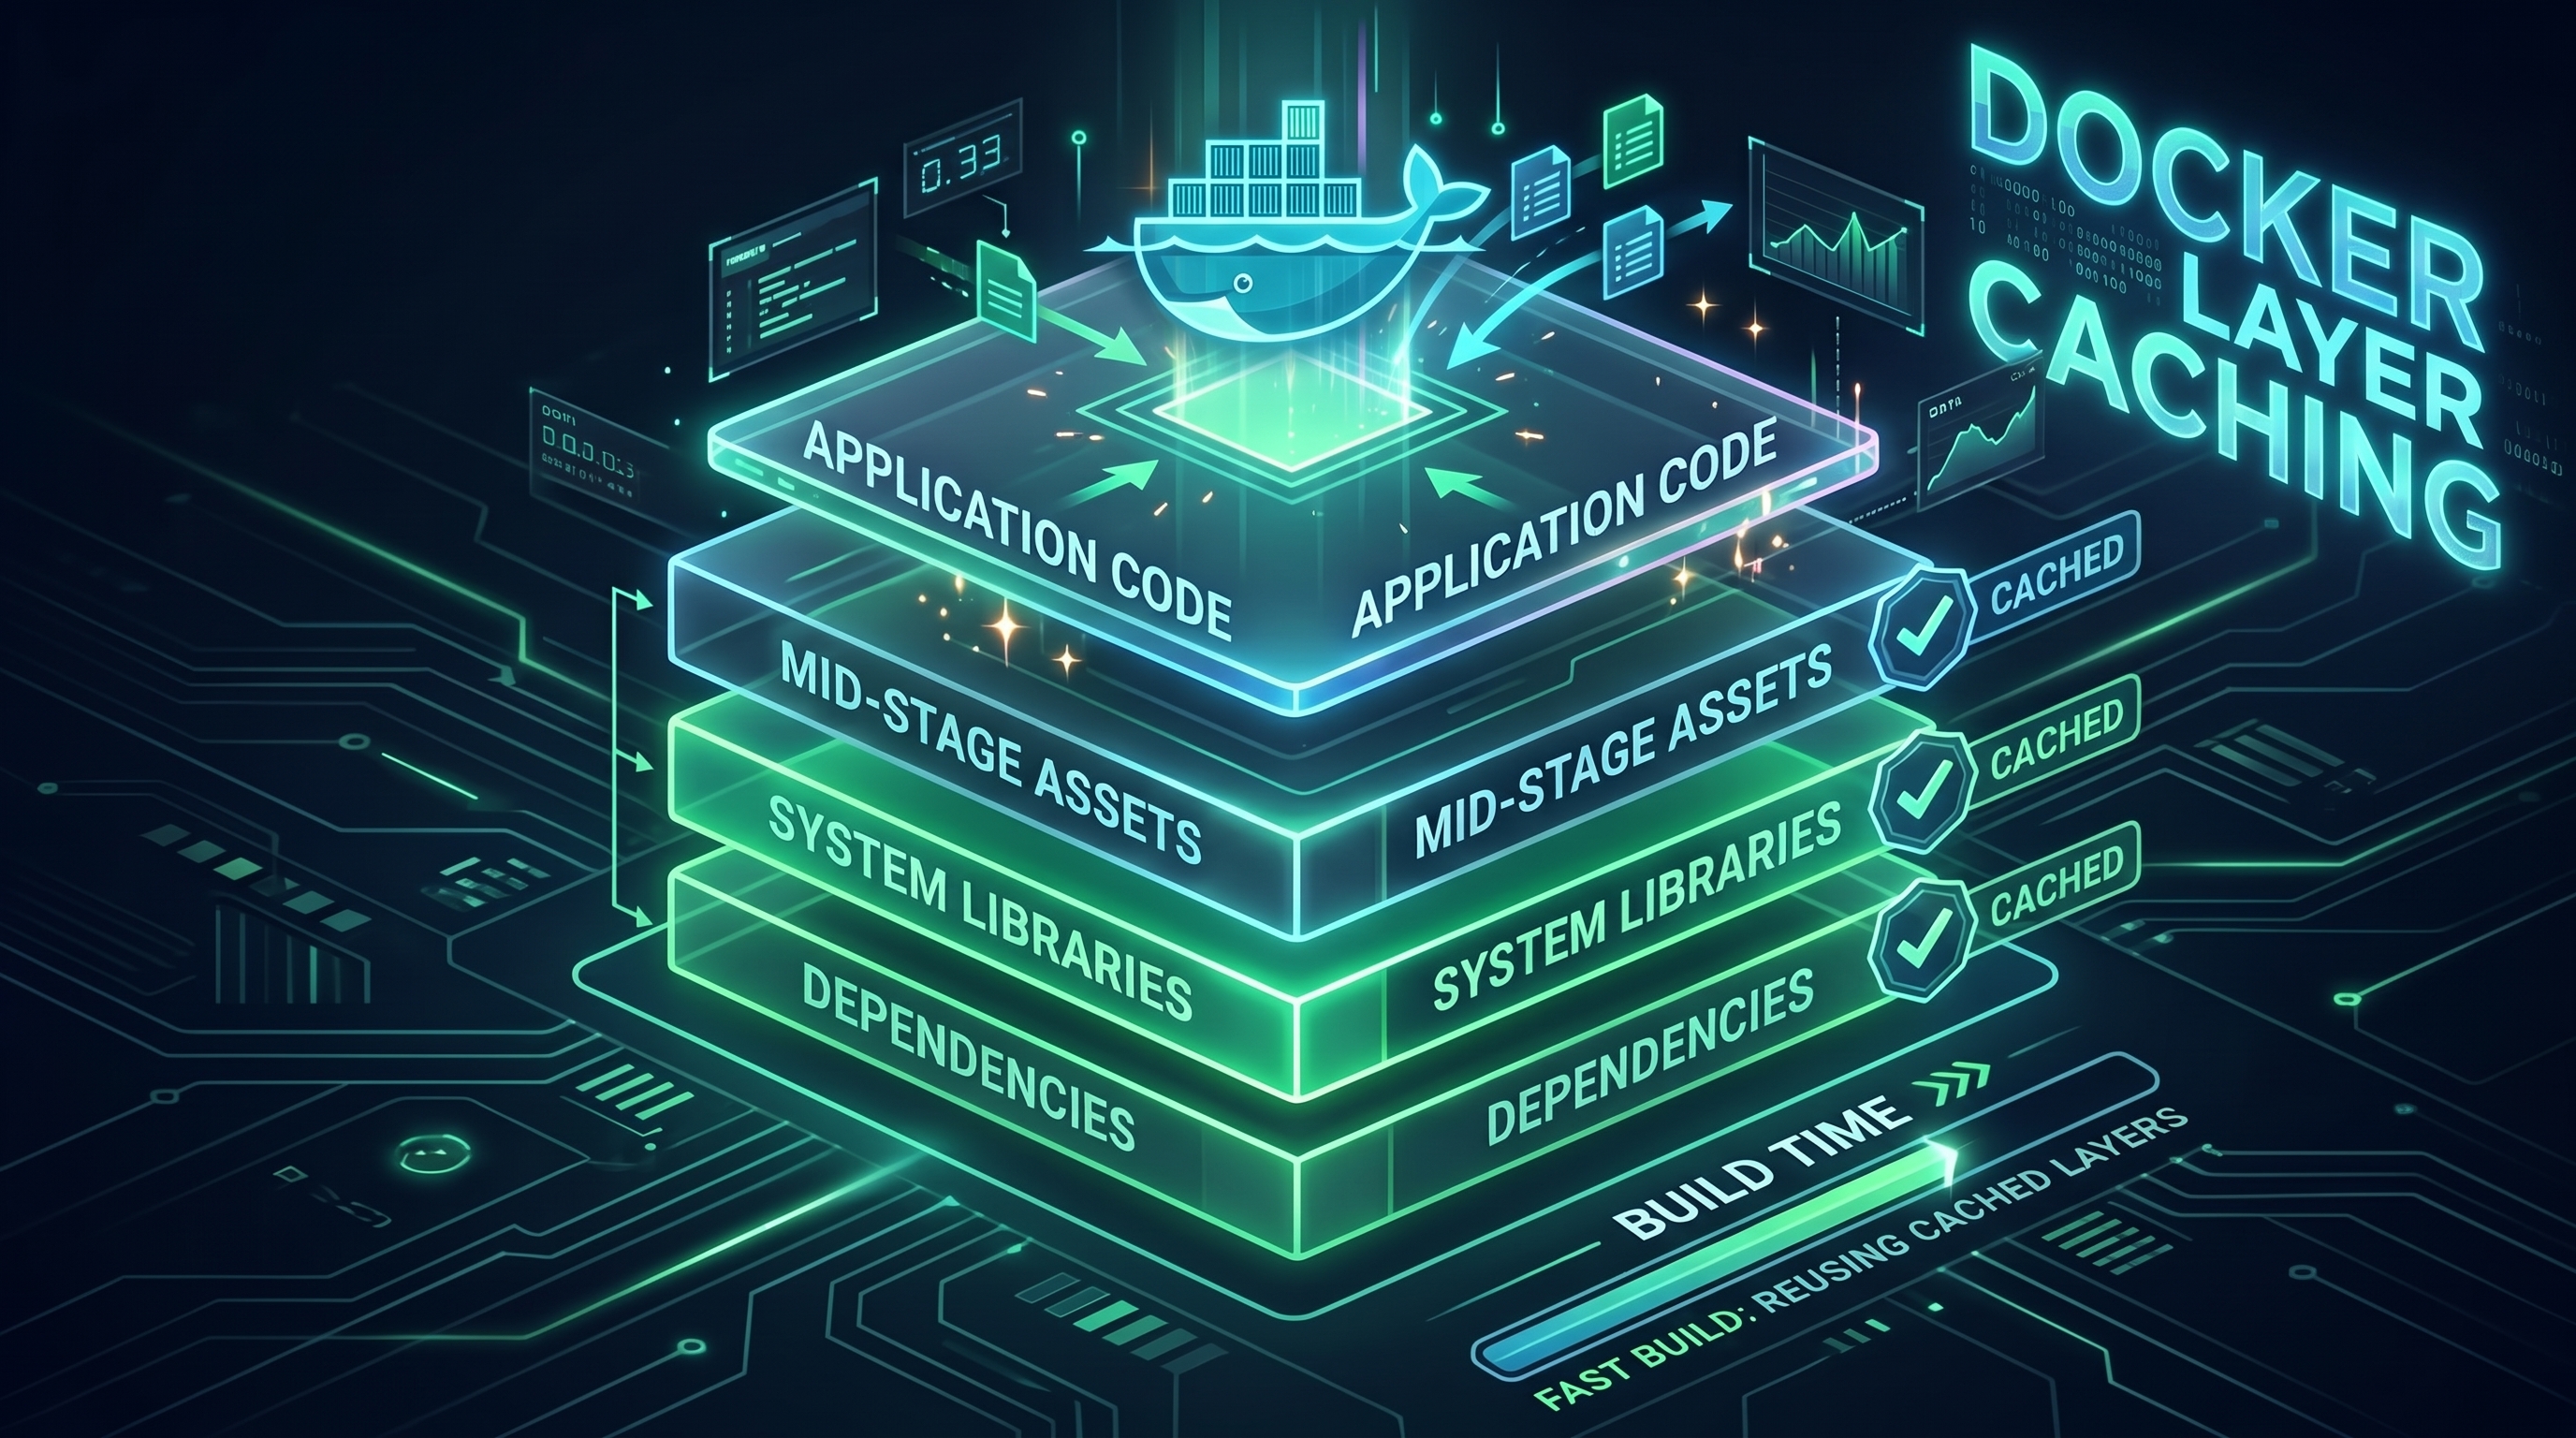
Docker builds images layer by layer. If a layer changes, all layers after it are invalidated.
Wrong (cache always breaks):
FROM node:20-alpine
WORKDIR /app
COPY . .          # ← copies everything at once — BAD
RUN npm install   # ← this layer changes with every code change
Right (cache survives code changes):
FROM node:20-alpine
WORKDIR /app
COPY package.json package-lock.json ./  # ← manifests only
RUN npm ci                               # ← this layer is cached as long as manifests don't change
COPY . .                                 # ← code comes after dependencies
The rule: from least frequently changed to most frequently changed.
5. .dockerignore — what stays out of the image
Without .dockerignore, COPY . . throws everything into the image: node_modules, .git, test files, documentation, IDE configs. This both slows down the build (copying over the network to the Daemon) and bloats the image.
A sample .dockerignore for a Go project:
# Build artifacts
/main
*.exe
*.test

# Version control
.git/
.gitignore

# Dependencies (should be reproduced via go mod)
vendor/

# Environment
.env
.env.*
*.env

# Docs and tests (not needed at runtime)
docs/
**/*_test.go
README.md
For a Maven/Spring project:
.git/
target/
.mvn/wrapper/
*.md
docs/
**/*Test.java
**/*IT.java
.env
Summary — how much can you gain?
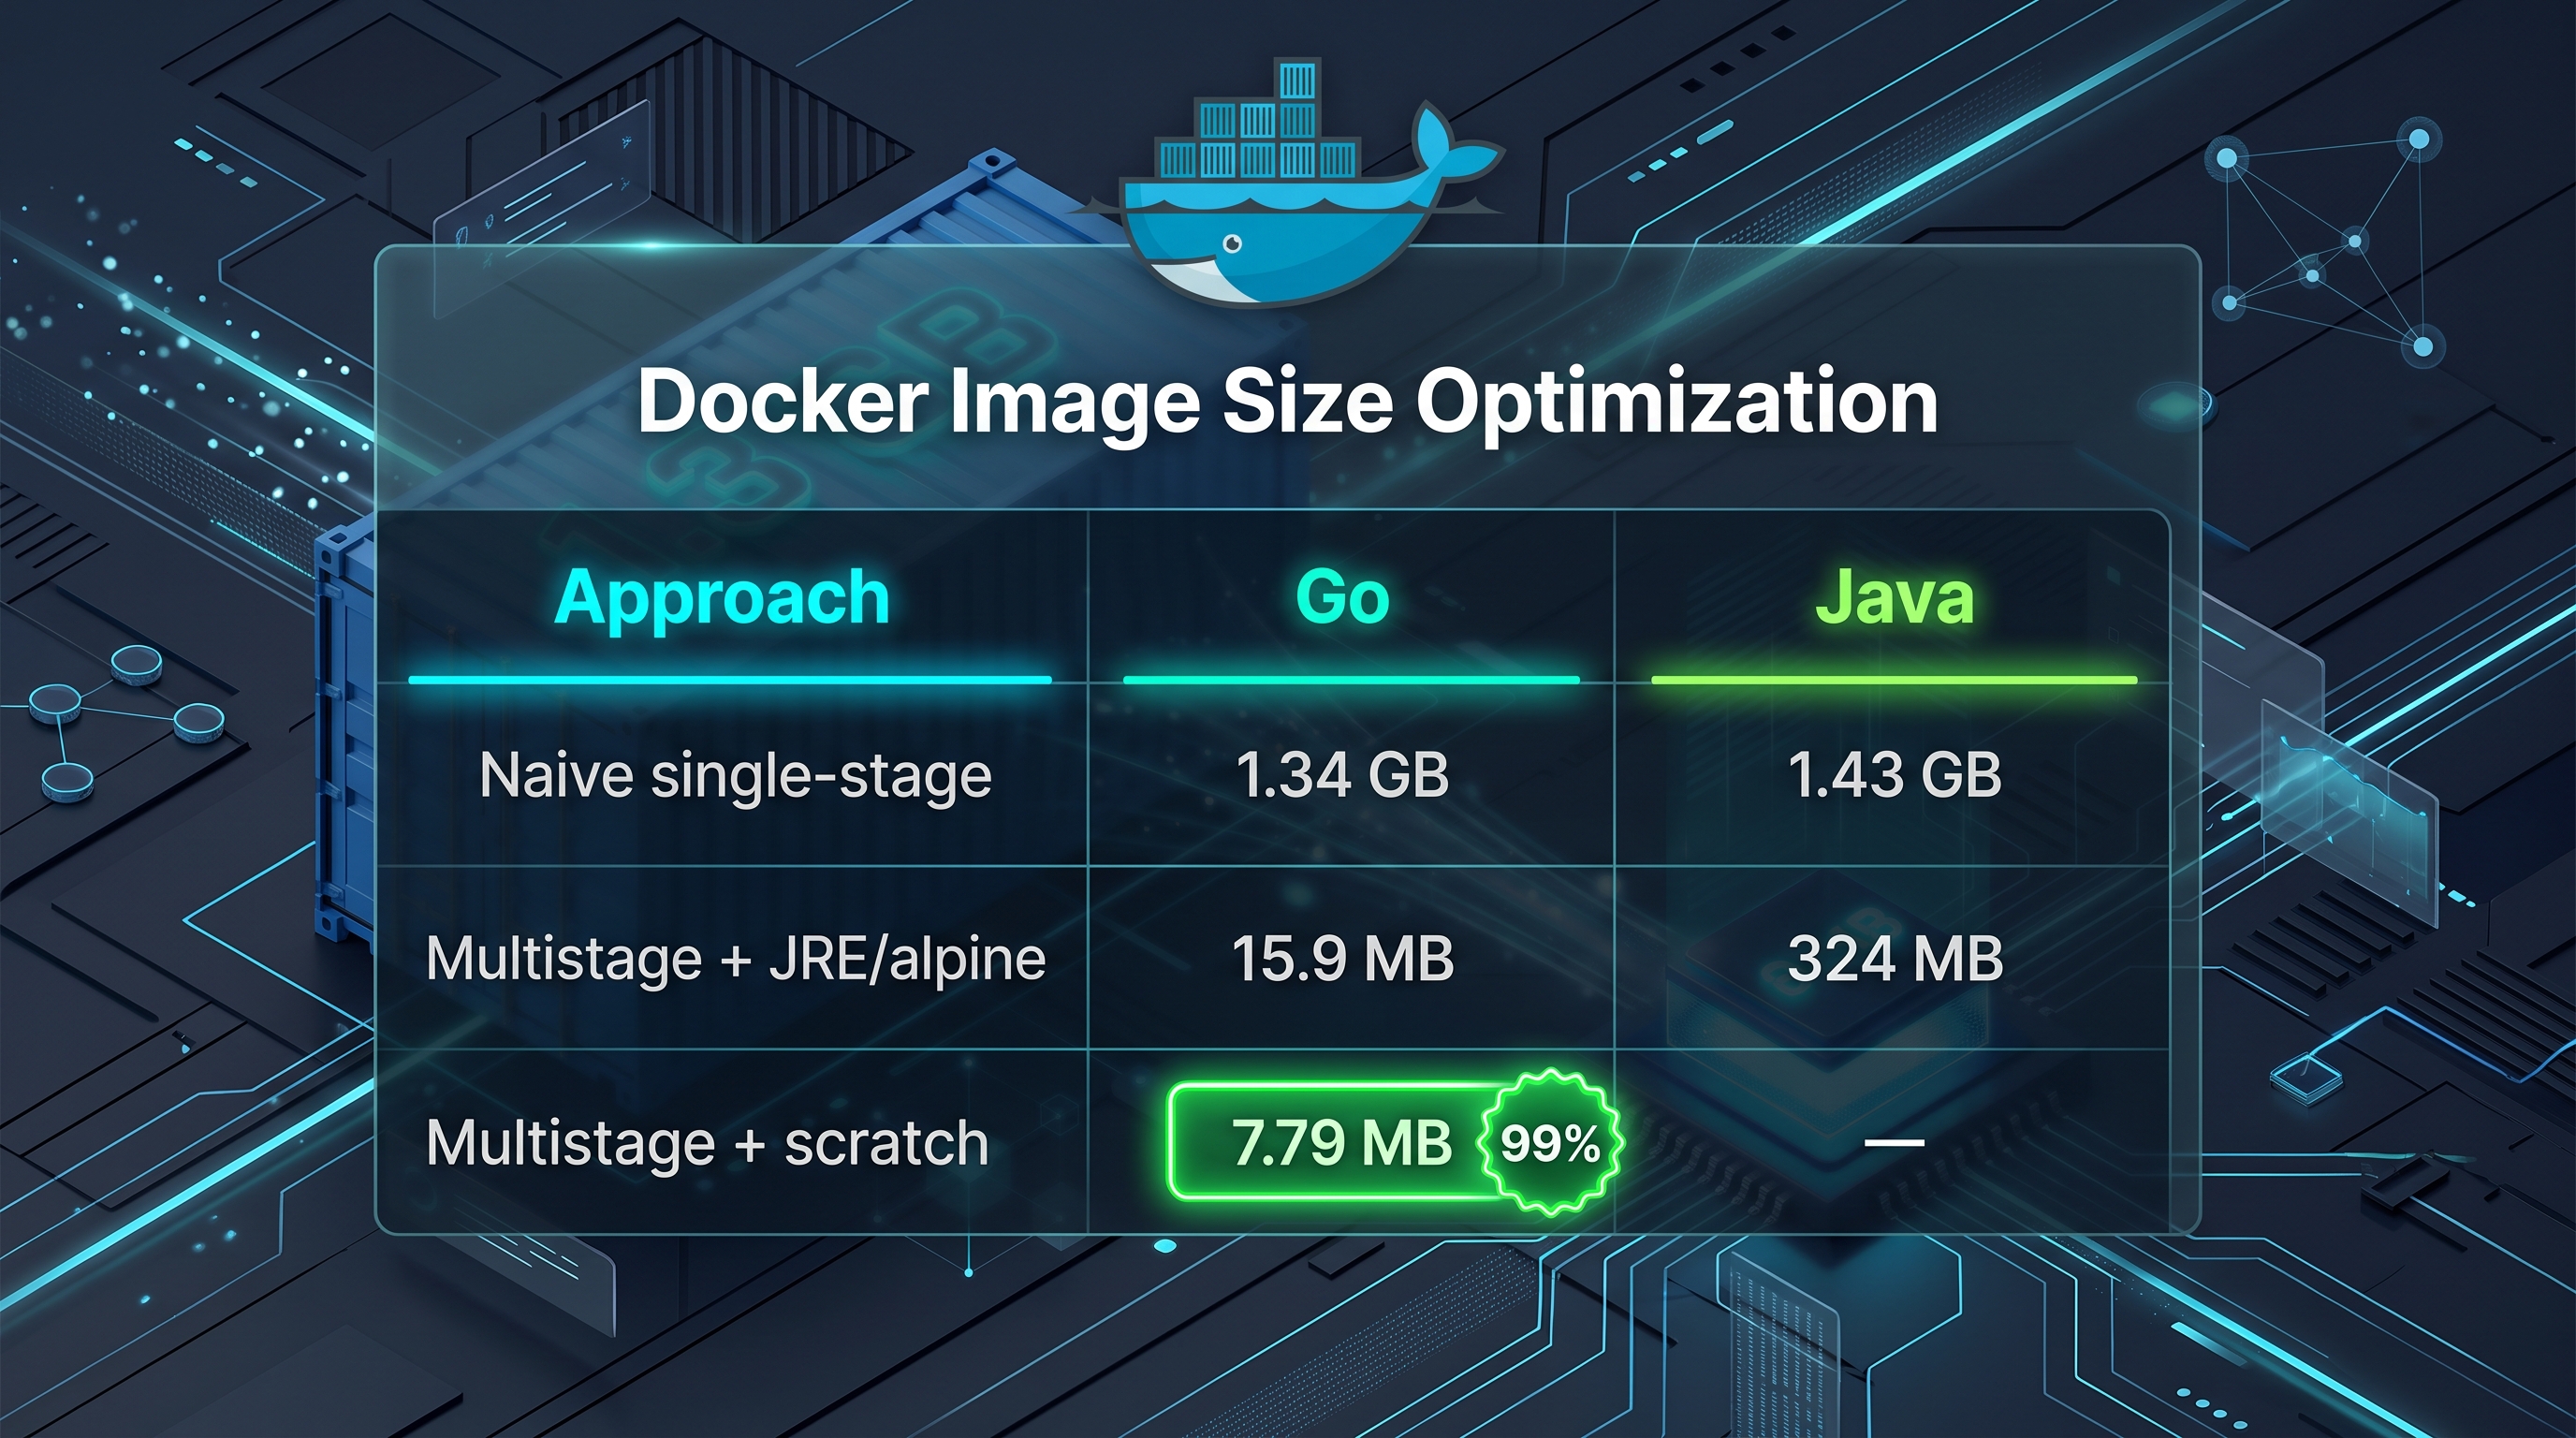
Key takeaways:
- Multistage builds is one Dockerfile change that gives a 77–99% reduction.
- CGO_ENABLED=0 + ldflags is a must for every Go project going to production.
- distroless is a good compromise — you get healthchecks and security without a full OS.
- Layer ordering determines how long a rebuild takes in CI — sort from stable to volatile.
- Spring Boot Layer Tools — if you write Java, set this up once and forget about it.
Image size isn’t just aesthetic — it’s security, deployment speed, and storage cost. Each of these techniques applies independently, but together they make a real difference.
What about you? What do your project images look like and where will you start? I’d love to read about it in the comments.